As its name suggests, pumpkin seed oil is extracted from the seeds of the humble pumpkin. It is a dark green oil with great flavor that has numerous health benefits. This vegetable oil is packed with essential fatty acids such as omega 3, 6 and 9, vitamins and antioxidants. Not only it is not only good for you, but for your palate too! Did you know you could make it at home? This step-by-step guide explains you how to.
Why making seed oil at home?
Apart from the joy of creating something from scratch, homemade oil allows you to control the entire process, ensuring the freshest and purest end product. Plus, it can be a rewarding and educational experience, connecting you with centuries-old traditions of seed pressing.
In this blog post, we will walk you through the step-by-step process of making your own pumpkin seed oil. From selecting the right pumpkins and harvesting the seeds to pressing and storing the oil, we’ve got you covered.
Along the way, we’ll provide valuable tips and insights to help you achieve the best possible results.
Before diving into the nitty-gritty details, it’s worth noting that while making oil at home is a relatively straightforward process, it does require some specialized equipment. However, with a few essential tools, you can set up your own mini-oil mill and embark on this exciting culinary adventure.

Selecting the Right Pumpkins: How to Make Pumpkin Seed Oil
A crucial step in learning how to make pumpkin seed oil is selecting the ideal pumpkins for the process.
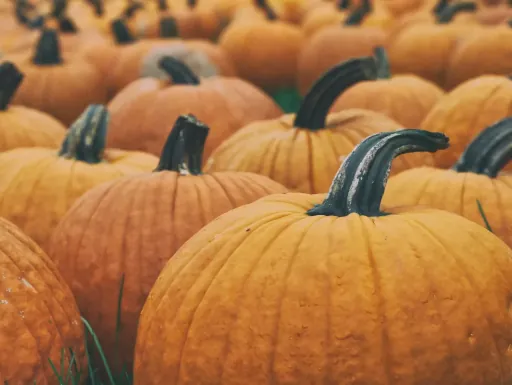
Not all pumpkins are suitable for oil production, so it’s important to choose the right varieties. Look for pumpkins specifically bred for their seed quality, such as Styrian or oilseed pumpkins. These varieties have seeds with high oil content, ensuring a more flavorful and potent end product.
When selecting pumpkins, opt for those that are fully mature and free from any signs of damage or rot. The size of the pumpkin doesn’t necessarily indicate seed quality. So focus on visual cues and the reputation of the pumpkin variety.
By carefully selecting the right pumpkins, you set the foundation for producing exceptional pumpkin seed oil.
Once you have selected the pumpkins, the next step is harvesting and cleaning the seeds. To ensure the best possible outcome, it is vital to extract the seeds using proper techniques. Cut the pumpkins open and scoop out the seeds, separating them from the pulp as much as possible.
Thoroughly clean the seeds by rinsing them in water, removing any remaining pulp or debris. After cleaning, allow the seeds to dry completely before moving on to the next stage. This meticulous process of harvesting and cleaning the seeds lays the groundwork for creating high-quality seed oil with optimal flavor and purity.
Roasting the Pumpkin Seeds
One of the essential steps in the process of making pumpkin seed oil is roasting the seeds before pressing them.
This step offers several notable benefits. Firstly, roasting enhances the flavor profile of the pumpkin seeds. It brings out their natural nuttiness and adds depth to the resulting oil. The gentle heat of roasting also helps break down the cellular structure of the seeds. Thus, making it easier to extract the oil during the pressing stage.
Additionally, roasting promotes the release of natural oils within the seeds, resulting in a higher oil yield. The roasting process also imparts a delightful aroma to the seeds, which carries over to the extracted oil, further enhancing its overall sensory experience.
By taking the time to roast the pumpkin seeds before pressing, you can elevate the taste, aroma, and yield of your homemade pumpkin seed oil. This ensures a more flavorful and satisfying end product.

To maximize the flavor of your homemade pumpkin seed oil, follow this step-by-step guide for roasting the seeds.
Pumpkin seed roasting recipe
First, preheat your oven to around 325°F (165°C) and line a baking sheet with parchment paper.
Next, thoroughly clean and dry the pumpkin seeds, removing any remaining pulp or debris. In a bowl, toss the seeds with a small amount of oil to coat them evenly. You can use olive oil, vegetable oil, or any oil of your preference.
Spread the seeds in a single layer on the prepared baking sheet, making sure they are evenly distributed. For an added burst of flavor, sprinkle the seeds with salt, or get creative with spices like paprika, garlic powder, or cayenne pepper.
Place the baking sheet in the preheated oven and roast the seeds for about 15-20 minutes, or until they turn golden brown and become fragrant. Remember to stir the seeds occasionally during the roasting process to ensure even browning.
Once roasted to perfection, remove the seeds from the oven and allow them to cool down completely. Following this step-by-step guide for roasting the seeds will infuse your pumpkin seed oil with a delectable and distinctive flavor that will delight your taste buds.
Pressing the Pumpkin Seeds
Pressing the pumpkin seeds is a crucial step in the process of making homemade pumpkin seed oil.
Once the seeds have been roasted to perfection, they are ready for extraction. There are different methods available for pressing the seeds, including traditional and modern approaches. Traditional methods involve using a manual press or mortar and pestle to crush the seeds, followed by applying pressure to extract the oil.
Modern methods may utilize mechanical presses or oil extraction machines that automate the process for greater efficiency.
Whichever method you choose, the goal is to extract the oil from the seeds. The seeds are usually crushed or ground into a paste-like consistency. The crushed seeds are then subjected to pressure to release the oil. This pressing stage requires precision and patience, as you carefully extract every drop of the precious pumpkin seed oil.
By understanding the pressing techniques and selecting the method that suits your resources and preferences, you’ll be well on your way to producing your own homemade pumpkin seed oil with exceptional flavor and quality.
Filtering and Storing the Oil: How to Make Pumpkin Seed Oil
Once you have successfully extracted the pumpkin seed oil, it’s essential to filter and store it properly to maintain its freshness and quality.
Filtering the oil helps remove any impurities or sediment, ensuring a clear and pure end product. You can use a fine-mesh strainer or cheesecloth to strain the oil and eliminate any solid particles. Alternatively, using specialized oil filter paper or a gravity oil filter can provide even better filtration results.
Once the oil is filtered, it’s time to store it in suitable containers. Opt for dark-colored glass bottles or jars to protect the oil from light exposure. This is very important as light oxidizes the oil and reduces its quality.
Seal the containers tightly to prevent air from entering and causing rancidity. Store the pumpkin seed oil in a cool, dark place, such as a pantry or refrigerator, to prolong its shelf life and preserve its flavors and nutritional benefits.
By following proper filtering and storage techniques, you can ensure that your homemade pumpkin seed oil remains fresh and delicious for an extended period, allowing you to enjoy its unique qualities whenever you need it.
Additional tips and tricks to enhance the oil-making experience
In addition to the main steps involved in making pumpkin seed oil, here are some additional tips and tricks to enhance your oil-making experience.
Firstly, consider experimenting with different pumpkin seed varieties to explore unique flavors and oil characteristics. Additionally, to extract the maximum amount of oil from the seeds, you can consider grinding them into a fine powder before pressing.
This increases the surface area and facilitates better oil extraction. Another tip is to store the roasted pumpkin seeds in an airtight container before pressing them. This allows the seeds to release more oils, enhancing the overall oil yield. Furthermore, to get a more intense flavor, consider adding roasted or toasted spices to the pumpkin seeds before pressing. Good candidates are cumin, coriander, or paprika.
Lastly, don’t forget to label and date your homemade pumpkin seed oil bottles. Without that, you might find it hard to keep track of its freshness and enjoy it at its best. Incorporating these additional tips and tricks into your oil-making process will add depth, creativity, and enjoyment to your pumpkin seed oil production.
Conclusion
By following the step-by-step instructions and incorporating the tips and tricks we’ve shared, you now possess the knowledge and skills to create your own flavorful and nutritious seed oil right in your own kitchen.
From selecting the right pumpkins and harvesting the seeds to roasting, pressing, filtering, and storing the oil, each step plays a crucial role in ensuring the best possible outcome. By taking the time and effort to make pumpkin seed oil at home, you not only have control over the quality and freshness of the final product but also gain a deeper appreciation for this versatile ingredient and its many benefits.
Whether you use it to enhance your culinary creations or explore its potential for skincare and health, your homemade pumpkin seed oil is sure to impress and delight. So, don’t hesitate to embark on this rewarding journey, and let the rich flavors and wholesome goodness of pumpkin seed oil elevate your culinary endeavors to new heights.
Enjoy the fruits of your labor and share the joy of homemade pumpkin seed oil with family and friends. Happy oil-making!

